
 Español



A leaking needle valve usually announces itself quietly: a drip under the valve body, a faint hiss at the stem, or a damp stain that keeps coming back after a wipe. The right fix depends on which kind of needle valve you are holding. In an instrument or hydraulic line, the valve is a precision flow-control component that may be sealing process fluid at pressure. In a carburetor, the float needle valve controls fuel level in a bowl. Both use a needle and seat, but the repair routines are different.
This guide separates the two cases, then walks through the industrial repair sequence that matters most when safety, sealing, and repeatability are on the line.
Know which needle valve you are working on
An industrial needle valve is a manual valve with a tapered stem tip that moves into a seat to throttle flow. It is common in sampling systems, pressure instrumentation, manifolds, hydraulic test stands, and general utility lines. A carburetor float needle valve performs a different job: it opens and closes the fuel inlet as the float rises and falls. If you need a refresher on the industrial type, this overview of needle valve applications and how it works is a useful starting point.
The leak location tells you a lot. On an industrial valve, fluid may appear at the packing gland, the bonnet joint, the seat, a threaded port, or a tube connection. On a carburetor, excess fuel often shows up as overflow, a wet float bowl, or a rich-running engine. Do not start by tightening every nut you can reach; that can turn a simple seal replacement into a damaged stem or distorted seat.
Read the leak point before you turn a wrench
Use the table as a first-pass diagnostic. It is not a substitute for the valve manufacturer's instructions or your site's safety procedure, but it helps you avoid replacing the whole valve when a seal or fitting is the real problem.
| Leak location | Likely cause | First check |
|---|---|---|
| Stem or packing gland | Worn packing, loose gland, damaged stem surface | Tighten only to the maker's limit; replace packing if the drip persists |
| Bonnet or body joint | Degraded gasket, loose bonnet, damaged sealing face | Isolate and depressurize; inspect the seal and joint face before reassembly |
| Seat or needle tip | Debris, scoring, galling, or a tip that no longer seats | Clean and inspect the seat; replace the trim if the sealing surface is damaged |
| Threaded port or tube connection | Incorrect sealant, loose fitting, damaged ferrule, or wrong thread engagement | Check thread condition and remake the connection with the correct method |
| Valve body | Crack, porosity, or corrosion-through-wall | Replace the valve; do not patch a pressure boundary in service |
Make the repair safe, even if the leak looks small
A small drip can still mean a live pressure boundary. Before loosening anything, establish zero energy and confirm it.
- Identify the fluid, its pressure, and its temperature. Use the correct PPE for the process, not just for the valve.
- Isolate the valve from pressure and flow. Close the upstream isolation, then open a downstream vent or drain if the procedure allows.
- Lock out and tag out the isolation point where required. Do not rely on a hand-tight valve handle as the only barrier.
- Watch the gauge until pressure is truly zero. Some trapped volume can remain between two closed valves.
- Place a tray or absorbent pad under the work area and keep compatible plugs or caps ready for open ports.
- For hazardous, corrosive, or oxygen service, follow the site's specific procedure. This is not a place for improvised parts or sealants.
Common causes on industrial needle valves
Most field leaks fall into a few repeatable categories:
- Packing compressed too little, too much, or not aligned with the stem.
- A bonnet gasket that has hardened, swelled, or been installed dry.
- Debris lodged between the needle tip and seat, often after maintenance or a dirty supply line.
- Seat scoring from repeated over-tightening or from turning the stem against a partly open seat.
- Thread damage at the port, a mismatched thread standard, or a tube ferrule that was not properly pulled up.
- Thermal cycling that changes seal compression, especially where the valve is exposed to hot and cold cycles.
- Material mismatch: an elastomer that is not compatible with the fluid, or a stainless body used in a chloride-rich environment without the right grade.
Step-by-step repair for an industrial needle valve
- Record the valve position and orientation before disassembly. A photo of the bonnet, handle, and tube connections can save guesswork during reassembly.
- Clean the outside of the valve so process dirt does not fall into the seat when you open it.
- Remove the handle and bonnet according to the maker's instructions. Catch the stem, packing, and any small parts in a clean tray.
- Inspect the needle tip and seat under good light. A ring-shaped mark is normal; a deep groove, galling, or a cracked tip is not.
- Clean the seat and stem with a method compatible with the process. Avoid abrasives that can change seat geometry or leave grit behind.
- Replace soft goods: packing, gaskets, and O-rings if used. Never reuse a swollen or hardened seal, even if it still looks whole.
- Check body threads and tube connections. If a ferrule was crushed or a thread was cross-started, remake the connection rather than adding more sealant.
- Reassemble in the reverse order. Tighten the bonnet and packing to the manufacturer's specification; avoid the "one more turn for luck" habit, which can damage the stem and add friction.
- Pressure-test with an approved method, gradually, at a pressure the valve is rated for. Check the stem at several positions, not just fully closed.
After the test, dry the area and observe it under normal flow and temperature. A leak that only appears when the valve is warm usually points to packing or a bonnet seal, not to the seat.
Repair or replace? A practical rule
Packing, gaskets, and accessible soft seals are repair items. A cracked body, a deeply scored seat, a bent stem, or corroded threads that will no longer seal are replacement items. In our experience with stainless steel needle valves, the decision becomes easier when you compare the cost of a controlled replacement with the risk of an unreliable repair on a pressure boundary.
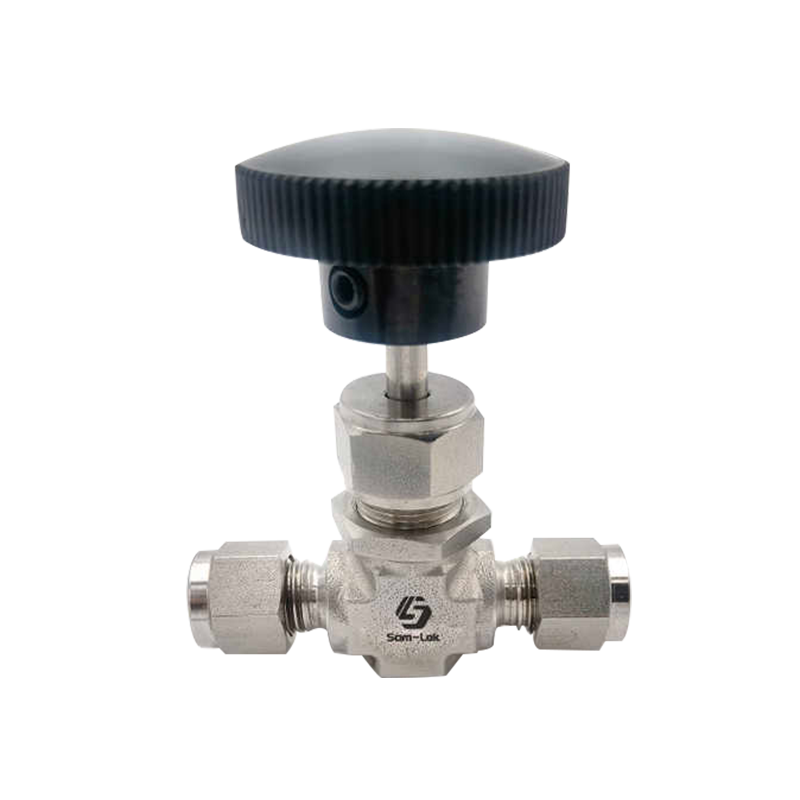 Stainless Steel Integral Bonnet Forged Double Ferrule Needle ValveForged stainless needle valve for high-pressure service, presented as a replacement option when repair of a scored seat or pressure boundary is uncertain.View Product →
If the leak is at the seat and the trim cannot be renewed cleanly, moving to a new valve is usually the safer path. For general utility lines that need fine throttling and a reliable shutoff, a general utility service needle valve may fit the duty more simply than a rebuilt precision valve.
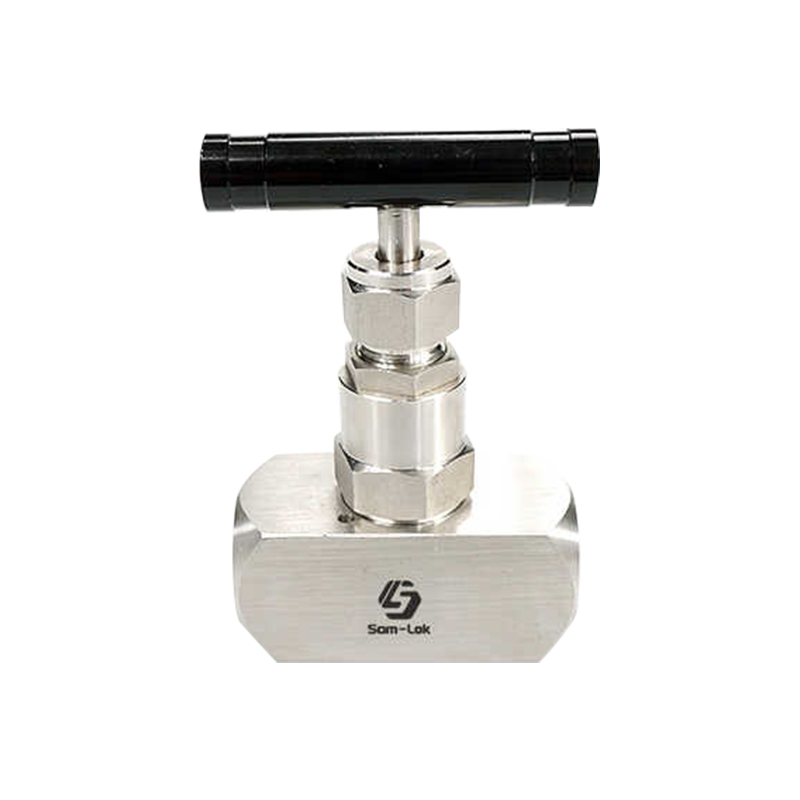 Stainless Steel General Utility Service Needle ValveA general-utility stainless needle valve for water, oil, gas, and chemical media, positioned as simpler choice for fine throttling and reliable shutoff on utility lines.View Product →
If the needle valve is in a carburetor
The phrase "leaking needle valve" also appears in small-engine and motorcycle carburetor repair. That needle is the float valve at the fuel inlet. The symptoms are usually fuel overflow, a flooded bowl, a rich-running engine, or fuel leaking from the carburetor throat or vent. The repair sequence is shorter, but it still depends on cleanliness and inspection rather than blind adjustment.
- Turn off the fuel and drain the float bowl into a suitable container.
- Clean the inlet needle and seat. Tiny grit or old fuel residue can hold the needle off its seat.
- Inspect the needle tip for a groove, flat spot, or hardened rubber. If the tip is worn, replace the needle and seat as a set.
- Check the float for fuel inside it. A float that has absorbed fuel or developed a pinhole will sit too low or too high and can flood the carburetor.
- Set the float height to the engine or carburetor specification. Do not bend the float tang by guesswork; a small change moves fuel level a lot.
- Reassemble, restore fuel slowly, and watch the overflow. If fuel still rises, stop and inspect again rather than running the engine.
Prevent the next leak
Use the right valve for the pressure, temperature, and fluid. Keep the upstream line clean, because debris that reaches the seat will find it. Train operators to close a needle valve to a firm seat, not to force it. On tube connections, use the correct ferrule pull-up and do not mix thread standards. During maintenance, replace all soft goods that were disturbed, and pressure-test the valve before it goes back into a critical line.
It also helps to keep a simple service record: leak location, fluid, pressure, parts changed, and test result. The next person who opens that valve will know what has already been tried.
A leaking needle valve is rarely just a nuisance. It is feedback from the sealing system. Identify the leak point, isolate the line, inspect the seat and seals, and test the repair before returning it to service. If the body or seat is damaged beyond reliable repair, replace the valve and keep the system moving safely.
