
 Español



A weep at a threaded valve connection is one of those small problems that can turn into a long day. It may appear as a stain under a ball valve, a drip where a needle valve enters a manifold, or a thin crust around a nipple. The right response is not to keep tightening the wrench. Thread leaks have a cause, and the repair is usually a short, careful process: make the area safe, find the real leak path, inspect the threads, prepare the joint, and tighten in a controlled way.
We have supplied stainless steel valves and fittings into instrumentation, hydraulic, and general fluid systems for more than a decade. Most thread leaks are not mysterious. They usually come down to damaged threads, the wrong sealant, insufficient or excessive engagement, or a joint that was forced together. This guide walks through the practical steps we use when a customer asks how to fix a leak in valve threads.
First, Make the Area Safe and Identify the Leak Path
Before any wrench touches the valve, isolate the line, depressurize it, drain the media, and follow your site’s lockout procedure. Allow hot parts to cool and wear the PPE required for the fluid involved. A threaded joint under pressure can release a surprising amount of energy when it is disturbed.
Next, confirm where the leak is coming from. A leak at the stem, bonnet, body casting, or packing is not a thread leak, and tightening the pipe connection will not fix it. Dry the area, wrap a clean cloth around the suspected joint, and watch where the liquid or gas reappears. If seepage is at the inlet or outlet threads, move on to the thread repair. Also identify the thread standard before buying parts or sealant: NPT, BSPP, BSPT, metric, and SAE threads are not interchangeable, and a mismatched pair can look almost correct while leaving a spiral leak path.
Why Threaded Valve Joints Leak
Threaded joints are simple, but they are not forgiving of small errors. Common causes include:
- Damaged threads: cross-threading, galling, corrosion pitting, or a crack in the valve port can create a path that no sealant will close.
- Wrong sealant or application: too little tape, tape wrapped the wrong way, excess paste pushed into the bore, or a sealant incompatible with the media.
- Incorrect engagement: a tapered thread that is only hand-tight may not energize; an over-tightened thread can distort the female port, especially in stainless steel.
- Thread mismatch: NPT and BSP threads have different forms and sealing behavior, and forcing them together damages both.
- Movement and thermal cycling: vibration or repeated heating and cooling can loosen a joint or work sealant out of the thread clearance.
How to Fix a Leak in Valve Threads: Step-by-Step
Once the joint is safe, work through the following sequence. Do not skip the inspection step; sealant is not a repair for damaged metal.
- Mark and disassemble carefully. Note the valve orientation and use two wrenches, one on the valve body and one on the mating fitting. Pull the joint apart without twisting the valve body or bending the pipe.
- Inspect both sets of threads. Look for flattened crests, galling, cracks, debris, and corrosion. Run a finger or a clean rag through the threads. If a thread is badly deformed or a valve port is cracked, replace the part.
- Clean and dry. Remove old tape, paste, and dirt with a soft brush and a compatible solvent. Dry the threads completely. Sealant will not bond properly to a wet or oily surface unless the product is designed for it.
- Match the sealant to the joint. Use PTFE tape or anaerobic thread sealant for tapered metal threads where site rules allow. For parallel threads with a designed washer or O-ring, the seal comes from the elastomer, not from extra torque.
- Apply sealant correctly. Wrap PTFE tape clockwise around the male thread, starting one thread back from the end, so it does not peel when the joint is tightened. With paste or anaerobic sealant, apply a thin, even band and keep excess out of the flow path.
- Start by hand. Thread the parts together by hand until they are snug. If the thread feels rough or cross-threaded, stop, clean it, and start again. Forcing a misaligned thread is how a small leak becomes a replacement job.
- Tighten in a controlled way. Use the manufacturer’s torque or a sensible feel for the size and material. Stainless threads gall easily when tightened dry or too fast. Back up the valve body so the force does not travel through the bonnet or stem.
- Pressure-test and recheck. Bring the system back into service slowly, check for leaks at operating pressure and temperature, and re-torque only if the manufacturer permits it.
If the male nipple or hex nipple is corroded, cracked, or visibly damaged, replace it rather than sealing over the defect. A matching stainless steel hex nipple is often the quickest way to restore a sound joint.
 Stainless Steel Hex Nipple for Industrial Pipe ConnectionsForged stainless steel male-to-male fitting for restoring a sound joint when a corroded or damaged hex nipple must be replaced.View Product →
Choosing a Thread Sealant That Matches the Joint
Sealant choice matters, but thread type matters more. A sealant helps fill the spiral clearance in a tapered thread; it does not correct a parallel thread that is designed to seal on a washer, and it cannot replace a damaged thread. Use the table below as a starting point, then confirm compatibility with the fluid, temperature, and site specification.
| Sealing method | Best used for | Keep in mind |
|---|---|---|
| PTFE tape | Tapered metal threads such as NPT | Wrap clockwise from the end; leave the first thread bare; keep tape out of the bore. |
| Anaerobic thread sealant | Metal threads where a liquid sealant is permitted | Clean and dry surfaces; allow the stated cure time; check media compatibility. |
| PTFE paste or thread dope | Tapered threads and larger fittings where tape is awkward | Apply a thin band; avoid excess; confirm temperature and chemical ratings. |
| Washer or O-ring joint | Parallel threads with a designed elastomer seal | The seal comes from the washer or O-ring; do not rely on over-tightening. |
Tightening Without Creating a New Problem
The correct tightness is enough to engage the thread and compress the sealant or sealing washer, not enough to deform the valve. Use a wrench that fits the flats properly, support the pipe or tubing, and avoid cheater bars on small stainless fittings. If a joint has to be forced past a rough spot, stop and inspect it. A thread that has been cross-threaded once is more likely to leak again, even if it now feels tight.
Remember that stainless steel can gall when mating surfaces are dry or when one part is tightened too quickly. A compatible lubricant or sealant recommended for the application can reduce that risk, but never substitute a product that is not rated for the media or temperature.
When to Repair and When to Replace the Valve
Repair is reasonable when the threads are clean, undamaged, and correctly matched, and the leak came from poor sealant application or insufficient tightening. Replacement is the safer choice when you find cracked threads, a split valve body, heavy galling, corrosion that has reduced the wall thickness, or a thread standard that cannot be matched safely. Repeated leaks at the same port usually point to a damaged seat surface or a valve that is not rated for the pressure and temperature of the line.
For high-pressure threaded shutoff, do not reuse a valve with damaged port threads. A stainless steel male thread high-pressure ball valve with the correct thread and pressure class is a more reliable starting point than a repaired port.
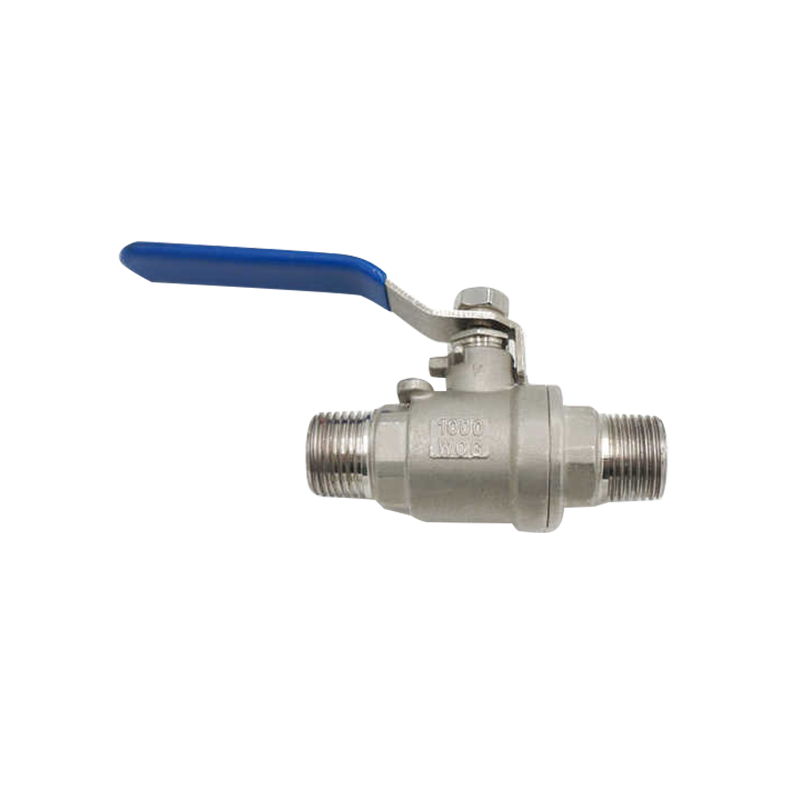 Stainless Steel Male Thread High Pressure Ball ValveA stainless steel ball valve with male-thread connection for high-pressure shutoff, offering quick 90-degree flow control where damaged port threads should not be reused.View Product →
If the leak turns out to be at a tube connection rather than the thread, our guide to double ferrule fitting installation and safety covers the inspection points that matter.
Preventing the Next Thread Leak
Most repeat leaks are installation leaks. Keep thread standards separate, inspect fittings before assembly, use the sealant specified for the joint, and tighten with the valve body backed up. On instrument lines, choose a valve with a body hex that can be supported properly and a thread that matches the mating component. If you need fine flow control rather than simple shutoff, a stainless steel female thread needle valve can reduce the temptation to over-torque a ball valve that was never intended for throttling.
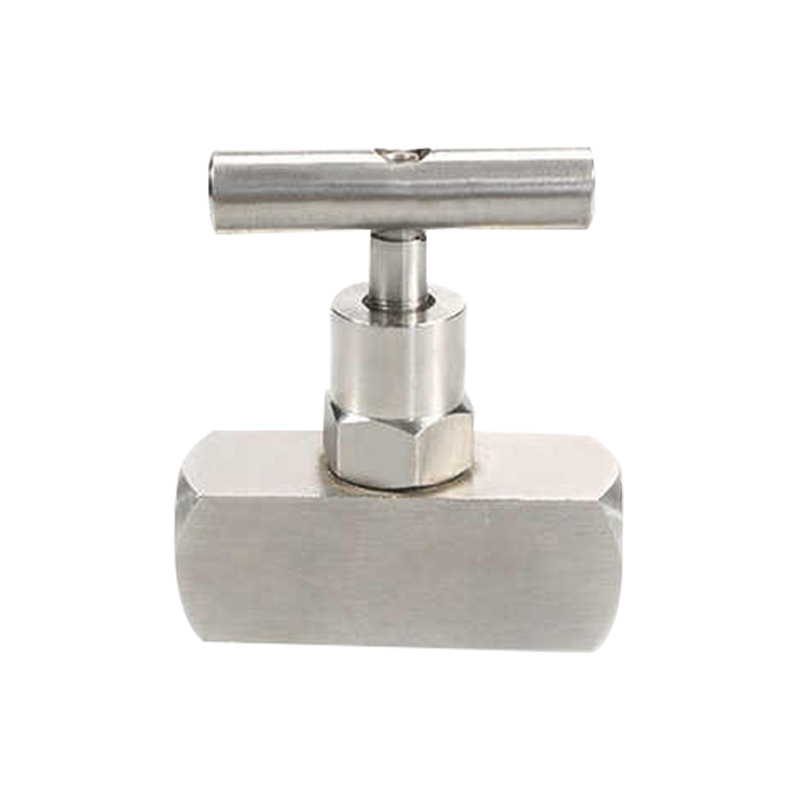 Stainless Steel Female Thread Needle ValveA stainless steel needle valve for precise flow adjustment in high-pressure lines, with female-thread connection and media compatibility including water, oil, gas, acid, or base.View Product →
Finally, pressure-test at the operating conditions you expect, not only at line pressure with the system cold. A joint that is dry at 20°C can weep at 120°C, and a thread that passes a static test can still loosen under vibration.
A thread leak is a symptom, not a sentence. Find the cause, respect the thread standard, and use sealant as part of a sound joint rather than a cover-up. If you are unsure which replacement valve or fitting matches your existing thread, our team can help you compare dimensions, materials, and pressure ratings before you order. At Samson, we have spent more than a decade helping customers solve practical fluid-system problems, and we are happy to talk through the details with you.
